
Ventis MX4


General Information
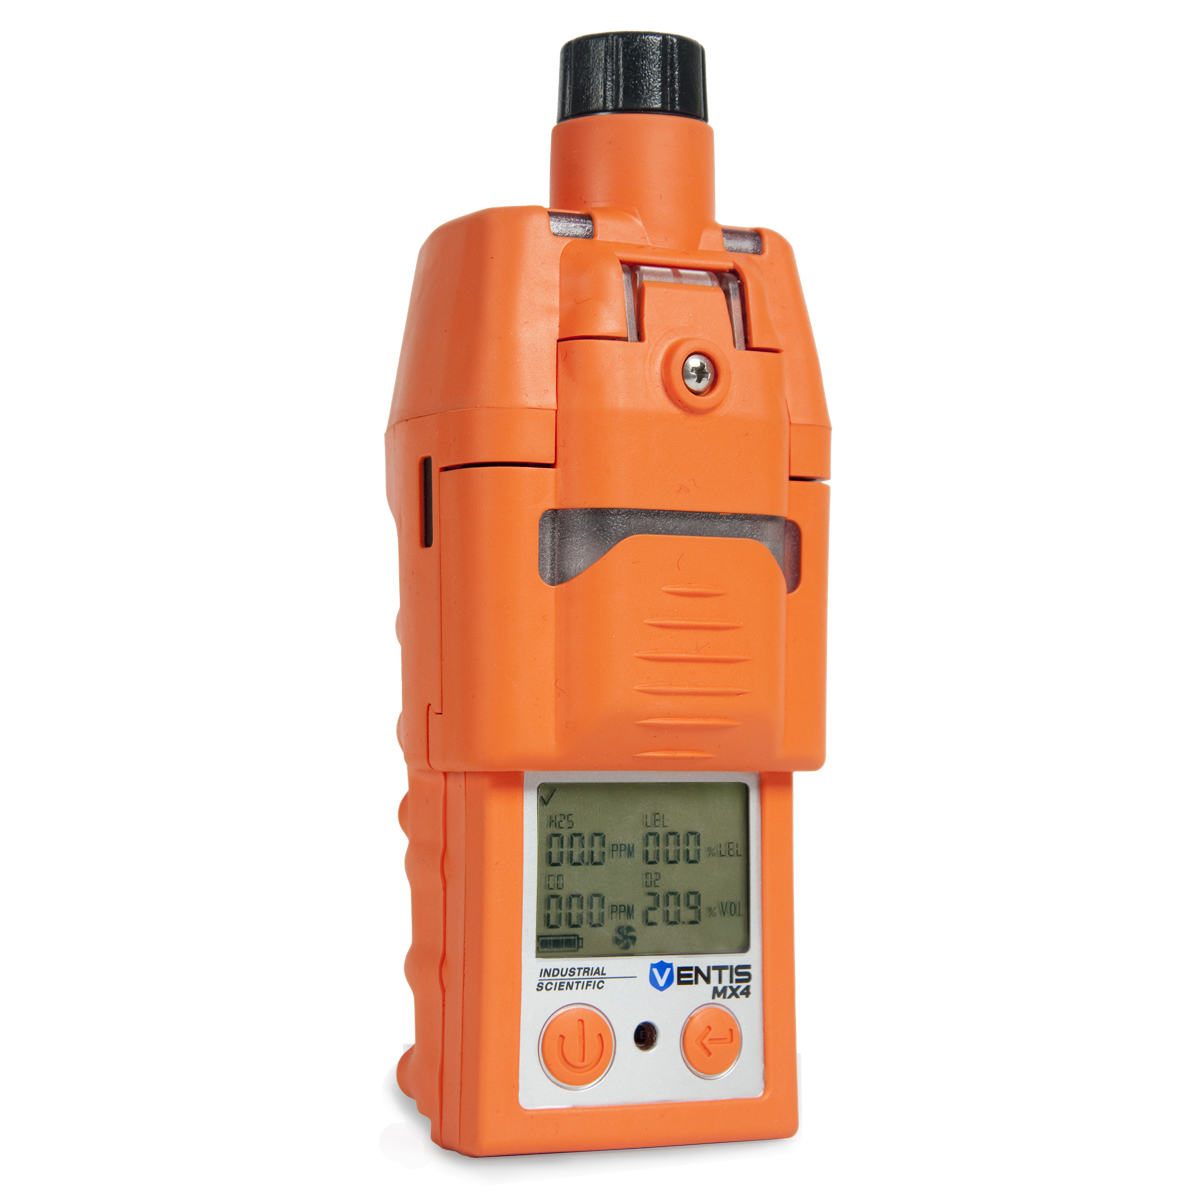
Get the simple, reliable gas detection you need with the Ventis MX4, a four-gas monitor designed to be rugged yet lightweight and easy to wear. The Ventis MX4 eliminates the need for extra monitors by transitioning seamlessly from personal monitoring to confined space entry with a slide-on pump. When you need a small, portable 4-gas monitor, rely on the Ventis® MX4. The rugged multi-gas monitor used with a DSXi Docking Station makes maintenance and reporting simple. Save time and reduce human error with maintenance and usage data available in Industrial Scientific’s iNet® Control software.
Features:
- Monitor up to four gases
- Configure for your application with your choice of sensors and pump options
- Transition seamlessly from personal monitoring to confined space entry using the Ventis® Slide-on Pump eliminating the need for extra equipment
- Simplify fleet management with your choice of black or orange overmold
Sensors and Measuring Ranges
- Combustible gases: 0-100% LEL in 1% increments
- Methane (CH4): 0-5% of vol in 0.01% increments
- Oxygen (O2): 0-30% of vol in 0.1% increments
- Carbon monoxide (CO): 0-1,000 ppm in 1 ppm increments
- Hydrogen sulfide (H2S): 0-500 ppm in 0.1 ppm increments
- Nitrogen dioxide (NO2): 0-150 ppm in 0.1 ppm increments
- Sulfur dioxide (SO2): 0-150 ppm in 0.1 ppm increments
How to calibrate your Ventis MX4
Want to calibrate the Industrial Scientific Ventis MX4? Here's how:
- Turn the Industrial Scientific Ventis MX4 on in normal reading mode. Do this by pressing and holding the power button on the left until you hear a beep.
- If your monitor has a pump Screw the demand flow regulator into the calibration gas cylinder, and attach the tubing to the hose barb on your regulator. Make sure the tubing is also connected to your calibration adapter.
- Once Industrial Scientific Ventis MX4 is in normal reading mode, you need to set it into fresh air calibration mode. Press the power button once to see the number of days since the last calibration then press it again to see the zeroing out process screen. Make sure you are in a fresh air environment and then press the enter button on the right to start zeroing out the sensors.
- Once it beeps to signal it's done zeroing the sensors, press the power button to send it into calibration mode.For a pumped monitor, put the tubing into the input port on the top of the monitor.For a passive diffusion monitor, slide the calibration adapter on top of the monitor then open the regulator to allow gas to flow.
- Once the calibration completes it will flash "P" next to each value to tell you that it is successfully calibrated. Make sure all the values have a "P" and your calibration gas values on the screen match what is on your calibration gas cylinder.
- Close and unscrew the regulator. If using a passive monitor, slide the calibration adapter off the monitor. Otherwise disconnect the tube from the input port.
- Congratulations! You have officially calibrated your Industrial Scientific Ventis MX4 gas monitor. Make sure to record these readings in your calibration log!
Standard Sensor Settings for the Ventis MX4
| Sensor Type | Calibration Gas Value | Low Alarm | High Alarm | TWA Alarm | STEL Alarm | Part Number |
|---|---|---|---|---|---|---|
| H2S - Hydrogen Sulfide | 25ppm | 10ppm | 20ppm | 10ppm | 15ppm | 17134479 |
| CO - Carbon Monoxide | 100ppm | 35ppm | 70ppm | 35ppm | 200ppm | 17134487 |
| LEL - Pentane Curve | 25% LEL | 10% LEL | 20% LEL | N/A | N/A | 17134495 |
| O2 - Oxygen | 18% VOL | 19.5% VOL | 23.5% VOL | N/A | N/A | 17134461 |